Creating an Object in Liferay is a breeze and doesn't require any coding skills. Liferay offers an intuitive user interface that enables users to define data structures, relationships, and behaviors for their application objects.
Here's a step-by-step guide on how to create an Object in Liferay:
1. Access Liferay's Control Panel : Log in to your Liferay instance as an administrator and navigate to the Control Panel.
2. Navigate to the Objects Menu : In the Control Panel, locate the "Objects" menu. Depending on your Liferay version, it might be located under "Object."
3. Create a New Object : Click on the "Add" or "New Object" button to start creating a new Object.
4. Define Object Details : Provide details about your Object, such as its name, description, and scope, according to your application requirements.
5. Design Object Fields : Define the attributes of your Object by clicking on the "Add Field" button. Specify field types (e.g., Text, Number, Date, Boolean) and set properties like field name, label, help text, and validation rules.
6. Establish Relationships (Optional) : If your application requires relationships between Objects, define them in this step. For example, in a content management system, you might establish a relationship between a "Blog Post" Object and a "Category" Object.
7. Save and Publish : Once you're satisfied with the Object configuration, click on the "Save" or "Publish" button. Liferay will automatically generate the necessary database tables, APIs, and service layers based on your Object definition.
8. Use Your Object : Your Object is now ready to be used in your Liferay application. You can start creating instances of this Object, accessing its APIs, and incorporating it into your application's logic.
By following these simple steps, you can leverage the power of Liferay's low code/no code capabilities to create and manage complex data structures effortlessly, without writing a single line of code. This empowers both developers and non-technical users to build robust applications efficiently within the Liferay ecosystem.
Now that you've successfully created an Object in Liferay,
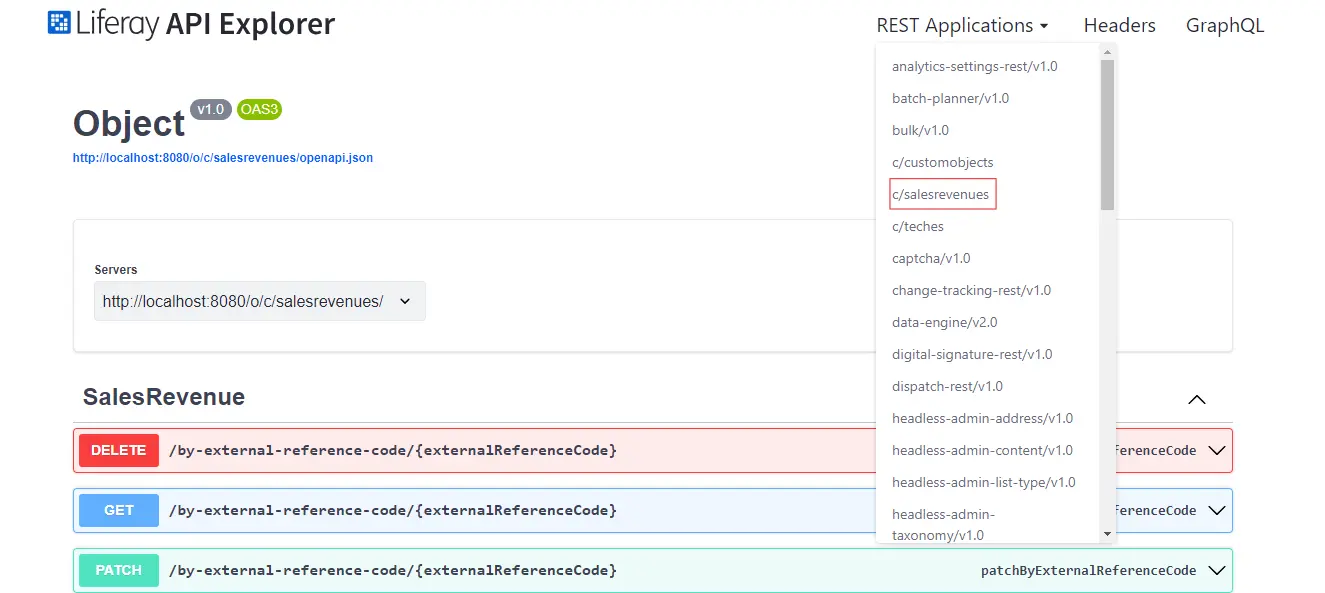
By creating Liferay objects, it automatically generates the API endpoints, simplifying the development process. In this example, we have successfully created the "salesrevenue" object. You can see the created API

Now, this created API is versatile and can be utilized anywhere within your ecosystem. Whether you're developing frontend applications, mobile apps, or integrating with other systems, the API provides seamless access to your Liferay data. Specifically, you can integrate this API into React fragments within the Liferay environment, leveraging the power of React's component-based architecture to build dynamic and interactive user interfaces. This integration ensures consistency and efficiency across your entire application ecosystem, empowering you to deliver a unified and cohesive user experience
Now ,let's delve into the process of creating React Fragments within a Liferay environment. Here's a step-by-step guide:
- Generate a New Fragment Project: Launch the Fragments Toolkit interface for generating a Fragments Project by executing the following command:
yo liferay-fragments
1. Name your project: Accept the default project name or provide a custom name.
? Project name (Sample Liferay Fragments)
2. Indicate whether to add sample content: Choose whether to add sample content to your project.
    ? Add sample content? Yes
    Creating directory
    force .yo-rc.json
    create src/.gitkeep
    .editorconfig
    create .gitignore
    create liferay-npm-bundler.config.js
    create package.json
    create README.md
Congratulations on generating your Fragments Project!
After successfully creating your React fragments, you can typically begin integrating your API in the index.js file. Once integration is complete, you can import it into your Liferay instance.
Then, follow these steps to import the sample Fragment Set to Liferay:
To import the Fragment Set into your Liferay instance, navigate to the project's root folder (for example, sales-revenue) and run the command:
yarn run import
You'll be prompted to provide the necessary details, including Liferay host & port, username, password, company ID, and group ID.
    $ yo liferay-fragments:import
    ? Liferay host & port http://localhost:8080
    ? Username test@liferay.com
    ? Password [hidden]
    Checking connection...
    Connection successful


    ? Company ID liferay.com
    ? Group ID Liferay DXP
    Building project...
    Importing project...
    Project imported
    force .yo-rc.json
    force ../../.yo-rc-global.json
    Done in 21.43s
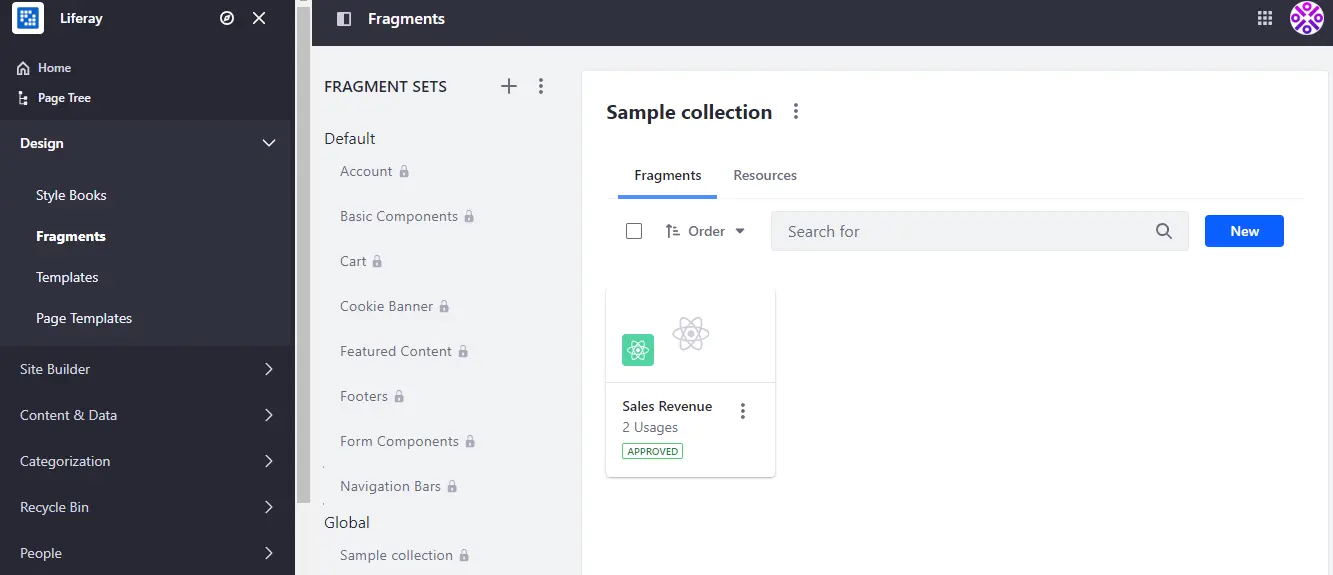
Now, your React fragment is successfully imported into your Liferay instance, and you can easily locate it under the "Design → Fragments" menu like this

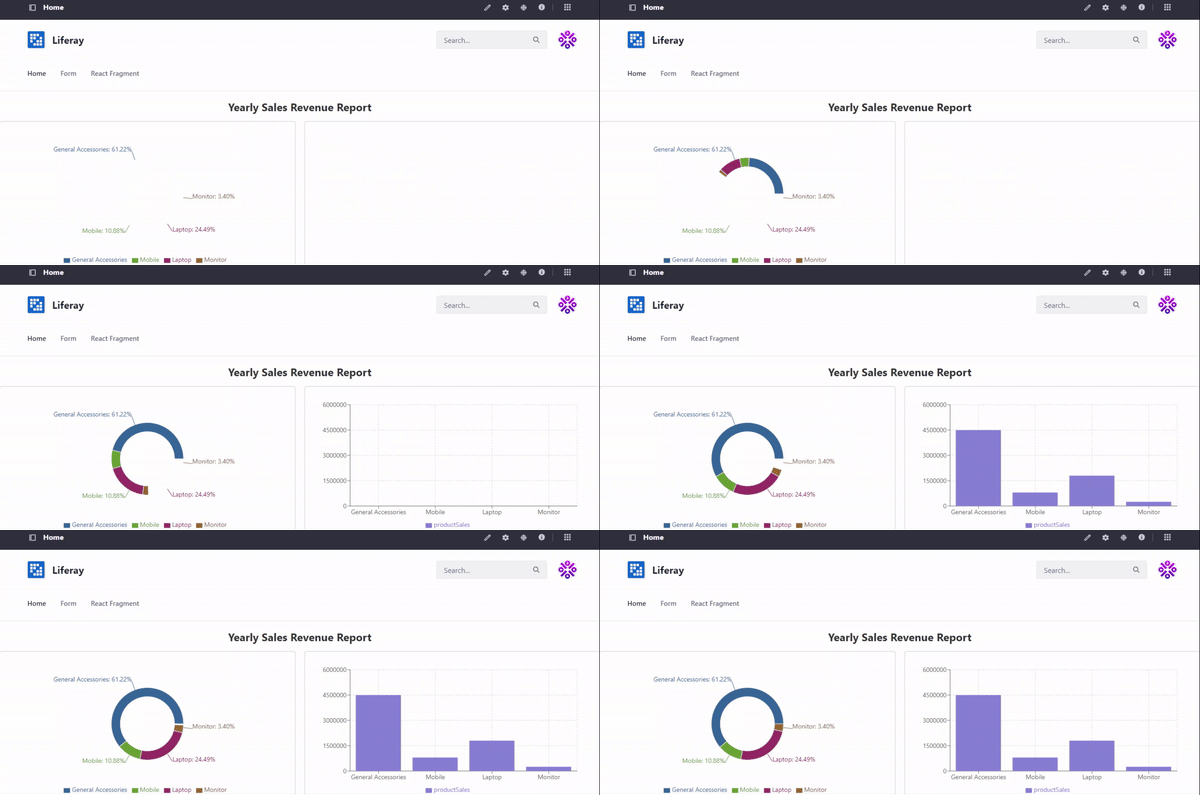
After importing, you can easily drag and drop this fragment onto your Liferay page. In this example, we have created both the object and fragment for "salesrevenue" and we've dropped it onto Liferay pages. You can see it depicted in the image below
For comprehensive business solutions and in-depth insights into Liferay objects and React fragments, connect with us at info@stockfish.app to unlock the full potential of your digital platform.


